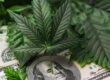
- Cannabis Medicine at home Kitchen Cannabis Oil by Nugs & Nurse Tori
- Cannabis Medicine at home by Nugs & Nurse Tori
- Cannabis Medicine at home Part 3 Custom Capsules by Nugs & Nurse Tori
To make very high quality oil safely in the comfort of one’s own kitchen is quite simple and inexpensive.
While Cannabis Medicine steadily gains acceptance as a legitimate treatment option for some of the World’s most devastating diseases, and we collectively inch closer toward the end of prohibition, one would assume accessibility to clean, consistent and affordable Cannabis Oil would NOT be an issue for those choosing Cannabinoid therapy. One would also mistakenly assume with the unprecedented number of ‘legal’ Cannabis dispensaries in states with working MMJ programs dispensing mountains of domestically grown Cannabis, that organically grown, lab tested contaminant free raw material would be simple to obtain. Even in non-legal states, with a thriving black market moving thousands of metric tons of domestic and imported ganja, one would think finding quality material to make their own medicine would be an easy task. Sadly for many of those burdened by debilitating disease, finding clean raw material, or a supply of high quality uncontaminated finished oil can be like finding a needle in a haystack.
In order for Cannabis or a Cannabis extraction to be a viable, effective medication for those with weakened immunity, compromised liver function or any other sensitive disposition, it MUST BE FREE OF CONTAMINANTS! Simply put, Cannabis used for making oil should be grown organically without the use of chemical fertilizers, pesticides, or fungicides. Most importantly, the raw material MUST be tested FREE of molds and mildew.
Homemade Cannabis oil intended for oral consumption should be extracted from the plant material WITHOUT the use of petroleum based solvents (naphtha, isopropyl alcohol, butane etc.) in order to avoid being contaminated with residual toxins. Organic (food grade) ethanol or 190 proof grain alcohol (Everclear) should be used for the extraction. Both are relatively easy to obtain, inexpensive and because they are food grade, minute amounts of residual alcohol left in the finished oil is not an issue. This can NOT be said about most extractions made with petroleum based solvents unless crafted by skilled professionals and lab tested to be completely free of residuals. To us, from a purely rational perspective it is counter intuitive to pollute an uncontaminated, organic medicinal herb with a toxic petroleum solvent and then expect it to be medicine for someone with an immune-compromised disposition. Many current heath issues are directly caused by exposure to toxic chemicals in our environment. They are in the food we eat, the water we drink, and the air we breathe. The very last thing we need is our medicines to be toxic as well.
Obtaining organically grown and contaminant free raw material may currently pose a challenge in todays Cannabis market, especially for people residing in non-legal states or those inexperienced in dealing with the black market. Fortunately, finding the material is the most difficult part of the entire process. To make very high quality oil safely in the comfort of one’s own kitchen is quite simple and inexpensive. The following method is designed for a caregiver or patient with average means to produce an extremely high quality Cannabis Oil using common equipment, safely and securely in their own home…..Power to the People!
Necessary Supplies
3 ounces high grade organic Cannabis
1250 ml organic ethanol or 190 proof Everclear (we prefer organic cane, or grape spirits)
8 inch stainless steel fine mesh strainer
6 qt. stainless steel pot
2- 1/2 gal mason jars
3- 1 qt. mason jars
3-’pour over’ single cup coffee brewing cones
1- white cotton ‘potato sack’ dishtowel cut into quarters
#4 unbleached cone coffee filters
5 x 7 in. glass pyrex dish
Rubber silicone spatula
20-cup digital rice cooker
Infrared (gun style) laser thermometer
Oven and freezer
Preparation
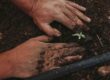
Begin by running the DRY Cannabis buds (or resin coated trimmings) through the 8 inch stainless screen strainer (work through with fingers), if the material is too gummy or sticky, place on a cookie sheet and place it in the oven at 200 degrees for 10 minutes or so, (this is not decarboxylation, which will come later) this is just enough to drive excess moisture out of the bud/trim, and make it nice and brittle. Discard seeds and stems.
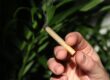
Cannabis Oil IS the resin!….The more resinous your starting material, the more potent and concentrated your finished oil will be. We used TGA’s “Dr. Who”, one of the most resin-heavy strains we have ever been blessed to work with.
Place 84 grams (3 ounces) of ground Cannabis in a1/2 gal.Mason jar and place in the freezer. Pour 1250 ml of alcohol into the second 1/2gal. mason and place in freezer along side the processed herb. We have found that 3 ounces and 1250 ml are perfect amounts for the volume of the jars we have to work with and makes for a very efficient extraction.
It is essential for the alcohol and Cannabis to remain in the freezer for a full 24 hours! There are certain non-essential constituents within the herb that we DO NOT want to dissolve into the alcohol solution, notably chlorophyll, proteins, lipids (plant fats), plant waxes, and cellulose. Freezing allows the alcohol to dissolve the plant resins first, and buys us a little time before the solvent begins to warm and dissolve the other unwanted constituents. For the actual extraction, we want to execute the process immediately after removing the jars from the freezer!
But first, set-up the stainless steel pot with the same 8 inch strainer (washed and dried) and two layers (two quarters) of the cotton dishtowel material within the strainer. Make sure to wash and dry the dishtowel material prior to use.
This set-up is VERY effective in straining out not only the greenery, but a good amount of any waxes that may have been extracted as well.
Quick Wash Extraction
We prefer to wash (extract) very quickly…. the material is only in contact with the alcohol for about two minutes total. Pour 2/3 (about 800ml) of the ice cold alcohol into the material jar, quickly swish around (15 seconds), let settle for 30 seconds, then use the lid to quickly strain out most the liquid into the strainer set-up, while leaving the bulk of the material in the jar. This should only take about 15 seconds to drain.
Quickly add the remaining alcohol to the material jar, swish for a few seconds, and in one quick motion, dump everything into the strainer. Let strain for 30 seconds. Bring up the edges of the dishcloth, twist into a tight ball, and squeeze HARD! Try to get as much of the solution squeezed out as possible. Pour the solution from the pot back into the mason that had the clean alcohol in it and place it back into the freezer for at least 12 hours, 24 preferably.
We have begun the Winterization phase where the waxes, proteins, and non-soluble fats that were extracted will congeal, freeze and precipitate out of the solution and settle to the bottom of the mason jar. This is a very important step, a prerequisite to initial filtering if you will.
Please Note: Extraction times will be slightly longer for CBD rich material (please see “Relevant notes and Considerations”)
Initial Filtering
Filtering the solution is critical. We want to remove any waxes, lipids or proteins that were extracted into the solution. If not removed these substances will scorch when the near finished oil is subjected to high oven temperatures needed for full decarboxylation. (More on this later). Three 1qt. mason jars equipped with single cup coffee brewing cones fitted with #4 unbleached coffee (cone) filters works very well for this volume of solution.
Set up your filter station as shown.
Gently remove the solution from the freezer not to disturb the sediment and immediately begin pouring SLOWLY and GENTLY (to keep the sediment as undisturbed as possible) and fill the first two cones to the top, then pour the remaining liquid and sediment into the third filter (this should fill it about half way). Try to decant the jar in one fluid motion; avoiding tipping the jar back up before all the solution is emptied. The first two filters will be filled with relatively clean liquid, and will run through the filters in about 10-15 minutes… the third will have the bulk of the sediment in it, and will run through the filter quite a bit slower, but because it is only about half way full, it will all finish up around the same time as the first two cones. Allow approx.30 minutes for the solution to drain through the filters.
When the filters are empty, combine all three-quart jars back into one clean 1/2 gallon mason, and place back into the freezer for 12 hours to prepare for the finish filtering. The solution will be quite clear at this point, as most of the sediment will have been removed.
Finish Filtering
Stack three or four #4 coffee filters in a brewing cone and place atop a clean 1/2 gal. mason. After the 12 hours, remove the solution from the freezer and pour through filters. The solution is pretty clean after the initial filtering, so it will run through the stacked filters rather quickly. The process should take only about 3-5 minutes.
The solution should be a beautiful clear amber color. The alcohol is now ready to be boiled off in the rice cooker.
Boiling Off the Alcohol.
Time to boil the alcohol off the resin. We prefer this particular digital rice cooker, It has a 20-cup capacity, and has a safety shut-off feature that just happens to be perfect for oil making, turning off at just the right temp/time. Set the cooker on “steam” for the max time, 29 min., and add ALL the solution. With the lid open, it should reach a full boil in about 5 minutes. It is VERY important to boil-off outside, or in an open screen porch or garage with the doors open. While alcohol is not nearly as explosive as butane or other petroleum solvents, we still want to provide for sufficient ventilation, and obviously NO sparks or open flames anywhere in the vicinity throughout the process. We prefer our screen porch with all the windows open.
Allow the solution to boil vigorously with the lid wide open. Avoid breathing the vapor, or any contact with the eyes. Never leave the cooker unattended! It will only take 15-25 minutes to boil down, so always keep a close eye on it.
Please note: As the level of solution drops, and the bubbles change and get bigger, everything will happen quite fast! Pay close attention!
Have an oven mitt on one hand, and the rubber spatula on the other and watch closely as it gets close to the point of pulling off the heat. You will see the bottom of the pot, and the bubbles will begin to get bigger and last longer. The oil will quickly begin to look like a thin bubbly syrup.
Use a silicone spatula to swish it around to prevent any scorching. Again, pay very close attention, the vapor will stop and will change to a slight smoke (very, very slight)…THIS is the exact moment to pull it off the heat and it will look like this. Move the oil with the spatula into the 5 x 7 pyrex dish immediately after pulling it from the cooker. Transferring oil between vessels is effortless when it is hot, and all of it can easily be removed from the cooker with just a few strokes.
Decarboxylation and Oven purging
It is now time to fully decarboxylate (activate) and purge the remaining alcohol from the oil. Place the pyrex dish into the oven set at 260 degrees F and allow 10 minutes or so for the oil to reach 260 degrees. Crack open the door and use a gun-style laser thermometer to check the rising temp. Once the surface of the oil reaches 260 degrees begin timing. Use the laser thermometer to check and adjust the temp every 3-5 minutes to keep the surface temperature as close to 260 degrees as possible. You may have to crack the door of the oven to lower the temp, or close it to raise it. We want 260 degrees F. for 15 full minutes with this volume to achieve full conversion of THC. The oil will bubble and purge, and then become flat and calm after the 15 min.
Simply by observing the surface, one can clearly see this batch to the left needs just a few more minutes. After the allotted time, remove the pyrex from the oven, and (while still hot) use the spatula to transfer the finished oil into a seal-able glass vessel (the oil may be weighed at this time) and store at room temperature away from excessive heat or direct light. Congratulations! You have made yourself some very high quality, extremely potent, contaminate-free Cannabis Oil! Truly proper medication!
Relevant Notes and Considerations -CBD OIL
Above is the extraction timing and decarboxylation temps/ timing for THC dominant oil. For a CBD dominant extraction, we let the material sit on the alcohol in the extraction jar for twice as long, perhaps up to 4 minutes total, but that is it. Any longer than that, and you will be pulling a lot of chlorophyll, and plant waxes out of the material as it thaws out of the freezer. Our test numbers confirm that a relatively fast/frozen wash on CBD is sufficient as well. We average 70-75% total (700-750mg/g) CBD in finished oil with a quick wash. We have recently broke the 20% mark for return (weight of starting material divided by weight of finished oil) with a CBD strain named La Pina, so we are quite happy with the actual CBD extraction weight with this method.
When converting (decarboxylating) a CBD extraction of this volume, the oven temperature and time are a little higher and longer. We have found 300 degrees F. for 25-30 minutes is sufficient to fully convert CBD. As a matter of fact, recent samples using the above method have been receiving rave reviews from laboratories for total CBD by volume, and total activation percentage. Our good friend Oriah, who uses this method shares his feedback from OG Analytical in Oregon.
“What a beautiful product! (High CBD Pennywise Oil) Both the THC and the CBD are FULLY decarboxylated. We don’t see that too often. Great job!!” Bethany Sherman, Executive Director, Oregon Growers Analytical
COLOR IS IMPORTANT
Properly made Cannabis oil should be a light amber brown color. In many cases, the lighter the better. Raw material grown indoors will often produce a lighter oil than it’s Sun grown counterpart. Here is a beautiful light colored batch made from material grown indoors. Dark brown, green or black oils generally have a high amount of plant material in them (waxes, chlorophyll, lipids, proteins, and contaminants) that easy scorch at decarboxlation temperatures and are subject to spoiling and molding during long-term storage. Some of the dark hues are directly caused by volatile organic compounds that have oxidized. We have discovered that many people are sensitive to these compounds as they can cause gastrointestinal discomfort upon ingestion. The medicinal properties of Cannabis are primarily contained within the oil-soluble resin glands, and this method focuses on the extraction of such resin.
As you can see, with some very common household supplies, the process of making high-grade Cannabis oil is quite simple. Sourcing quality organic raw material poses the biggest challenge. But with the proper know-how, just about anyone can make their own medicine, and get on the path to healing…. naturally.
Stay tuned for our next installment of this three part series on Homemade Cannabis Medicine. Part 2 we will cover Cannabis infused coconut oil using a pressure cooker! In part 3, we will wrap up the series with fully customizable capsules, blending the two preparations to create individualized doses!
To Your Health!
Nugs and Nurse Tori.
Originally published in Weed World Magazine issue 115